python3 -c "from livereload import Server; s=Server(); s.watch('.'); s.serve(root='.', port=5500, open_url_delay=1)"
A
Posts made by aizu
-
Python - live reload simple serverposted in Ref
-
Tinker with Kommu Assistposted in Inbox
Hello. First of all, meet me. I'm a SWE, been at it for 20-odd years now. Electrical and electronics is a side hobby that never quite stays on the side. I've got a couple of cars I like to tinker with, nothing fancy, just enough to keep me curious and occasionally confused with soldering iron and flux.
I've had a few exploration projects before, including one with a Perodua Axia. I do all of this purely for fun and curiosity. Will I do it for other people? No lah. Haha! This is strictly a "my cars, my weekends, my mess to clean up" kind of situation.
I want to be upfront. I know the risks involved in what I'm doing. I test carefully, I don't rush, and I don't stack changes on things that affect how a car behaves. If you're reading this and getting ideas, please think twice. Safety-related modifications are genuinely dangerous if you don't fully understand what you're poking at. I'm still learning myself, honestly. I just happen to enjoy the process. Read along, learn something, have a laugh with me, but please be careful with your own projects.
New Field for Me
I should be honest, while I've been writing software for a long time, CAN bus communication and ADAS systems are new territory for me. Understanding how the Kommu device and comma.ai's openpilot framework actually work under the hood has been... let's just say it's like opening a can of worms. A fascinating, beautifully-engineered can of worms, but a can of worms nonetheless.
That's a big part of why I'll be testing things thoroughly. I need to build a proper understanding of how CAN signals behave, how the control loops work, and how all the pieces fit together before I get comfortable moving forward.
The Platform
I'm running on Proton X90. The 2025-unit of X90. Not the cheap not-safe 2026 X90. - check Paultan. Sigh. Why la proton take out ADAS. The best part, removing BSM is a real mistake.
Well, I'm genuinely glad I ended up on the Geely platform. I was initially thinking about going the Toyota route, which is the well-trodden path in the openpilot world. But the Geely platform has something interesting going for it, the steering angle goes full max to max turning, because the X90 has self-parking. (I think this might be specific to the X90 only? I haven't tried other Geely-based cars, so I can't say for sure.) That full steering range opens up some interesting possibilities for lateral control.
Down the road, I might also see the Axia's ADAS for another round of headache exploration. See what we can do with that little thing. (I remember, Kommu team tried on Axia previously, got ping pong terrible issue).
I've been spending time just reading through the codebase from both the Kommu team and the comma.ai. I have to give proper credit to the Kommu team here. They've done a genuinely impressive job of productising (is that even a word?) the comma platform for the Malaysian market. The device is rock solid! And looking nice too! The code is open source, and clearly encourage exploration. The hardware is a bit pricey though. But well, not all good thing is cheap.
The Projects
I have a few projects in mind with the Kommu device. I won't go into all of them in detail, not trying to be a step-by-step guide for modifying safety systems. Just a jot for me, and probably spark other people to explore as well.
Here's what I'm thinking about.
Project 1: Bypass the LKA Requirement
This one's already figured out. It's a simple fix, literally one line of code.
The problem: In bukapilot v10.0.5 (
release_ka2), the X90 requires the car's LKA (Lane Keeping Assist) setting to be turned ON for bukapilot to control steering in ACC mode. In the previous version (v10.0.4), this wasn't needed - bukapilot would steer regardless of the car's LKA setting.Why it matters: When LKA is enabled in the X90's settings, the stock system plays an audible lane departure warning every time you cross a road line, even during intentional lane changes. It drives you mad. In v10.0.4, you could keep LKA off and bukapilot would still handle steering just fine. v10.0.5 broke that for ACC mode users.
The root cause: In
selfdrive/car/proton/carstate.py, the line changed from:# v10.0.4 — always let bukapilot steer ret.lkaDisabled = Falseto:
# v10.0.5 — only let bukapilot steer if LKA is on OR in ICC mode
ret.lkaDisabled = not (self.lka_enable or self.is_icc_on)
The Kommu team did this intentionally to fix an ICC disengagement bug. Makes sense for that use case. But the side effect is that ACC users with LKA off (like me) lost steering control.
The fix: Fork from
release_ka2, revert that one line back toret.lkaDisabled = False. Point the device to my repo fork, reboot, drive.Testing: This gets driven daily until I'm comfortable it's solid with my own fork. The changes just a single value, but nevertheless, again, this is still new for me. No timeline, it's a hobby after all. I've got a day job to keep my clients happy, and I need to practice my EUC riding too. Haha!
Project 2: Independent Lateral Control (Mode 2)
This is the bigger one. I'll keep it vague for now. Not really know how yet technically. I know it is possible, somehow X90 can turn on LKA, but at the same time not engage the cruise actively.
Urghh.. I hate the LKA stepping on line beeping. We live in motorcycle-respect world here in Malaysia. We always need to swerving left and right giving them more space.
The idea: A new driving mode where bukapilot controls lateral movement only, that's steering, keeping you in lane... while longitudinal control stays fully with the driver. That means gas and braking are all you, all the time.
Quick terminology guide, because I mix these up myself constantly:
- Lateral = steering = left/right = lane keeping. Think: Lateral = Lane.
- Longitudinal = gas/brake = speed control. Think: Longitudinal = Long road ahead.
Right now, kommu ties steering to cruise control activation (ACC/ICC). The moment bukapilot can steer, the car is also controlling your speed. I want to decouple that, kommu handles the lane, I handle the pedals.
The trigger would be a physical button on the car, something deliberate and driver-initiated that doesn't activate cruise control. The deactivation rules are things like: seatbelt removal, gear not in D, door open and steering self-force torque overriding the system. These get validated thoroughly before any activation logic gets written.
This project only starts after Project 1 feels rock solid. No rushing.
Project 3: The Rockchip Playground
The Kommu device runs on a Rockchip SoC, it's a surprisingly capable computer in your car. I want to explore what else it can do beyond ADAS. Think of it as turning the device into a Python playground on wheels.
No concrete plans yet. Just poking around.
Project 4: Second Device for ML
Further out. The idea is a second Kommu KA device dedicated to machine learning, object detection, traffic light recognition, more accurate lead car distance measurement. Keeping the ML workload separate from the primary ADAS device so one doesn't interfere with the other.
Project 5: Extra Eyes (just dreaming)
The most distant idea: additional cameras, left, right, and rear, feeding into the Rockchip. Combined with deeper CAN bus exploration on the X90. Lots of interesting possibilities, but firmly in the "maybe one day" category.
What's Next
Project 1 is ready to deploy. I'll post more as I see fit when there's something worth sharing. No schedule, no pressure.
If you're an X90 owner (a engineer too) hitting the same LKA warning issue, the fix might save you some headaches. Stay tuned.
Unshamely written with AI. haha!
-
impit - curl_cffi - browser - web scrapingposted in Linux
Tier 1 — Lightweight (no browser)
impit - browser impersonation made simple https://github.com/apify/impit
curl_cffi — TLS fingerprint spoofing. Popular in Python scraping community. Relatively new (2023+), growing fast.
tls-client — similar concept, Go-based TLS client with Python bindings. Used a lot in sneaker bots and ticket scalping.
got-scraping — Node.js equivalent, spoofs TLS fingerprints. Used by Apify (major scraping platform).
Tier 2 — Headless browsers (real browser engine)
Puppeteer — Chrome/Chromium via DevTools protocol. The OG.
Playwright — Microsoft's answer to Puppeteer. Supports Chrome, Firefox, Safari. Becoming the standard.
Selenium — older, slower, but still widely used.
-
99 Nama nama Allahposted in Inbox
Allah - Allah
Al-Rahman - Yang Maha Pengasih
Al-Rahim - Yang Maha Penyayang
Al-Malik - Yang Maha Berkuasa
Al-Quddus - Yang Maha Suci
Al-Salam - Yang Maha Sejahtera
Al-Mu'min - Yang Maha Mengamankan
Al-Muhaimin - Yang Maha Mengawal
Al-Aziz - Yang Maha Berkuasa dan Perkasa
Al-Jabbar - Yang Maha Perkasa
Al-Mutakabbir - Yang Maha Memiliki Segala Kebesaran
Al-Khaliq - Yang Maha Pencipta Sekalian Makhluk
Al-Bari' - Yang Maha Mengadakan
Al-Musawwir - Yang Maha Menjadikan Rupa Bentuk
Al-Ghaffar - Yang Maha Mengampuni
Al-Qahhar - Yang Maha Berkuasa
Al-Wahhab - Yang Maha Pemberi
Al-Razzaq - Yang Maha Memberi Rezeki
Al-Fattah - Yang Maha Pembuka Rahmat
Al-Alim - Yang Maha Mengetahui
Al-Qabid - Yang Maha Menyempitkan
Al-Basit - Yang Maha Melapangkan
Al-Khafid - Yang Maha Merendahkan Darjat Seseorang
Al-Rafi' - Yang Maha Meninggikan Darjat Seseorang
Al-Muiz - Yang Maha Memuliakan
Al-Muzil - Yang Maha Menghina Musuh-Nya
Al-Sami' - Yang Maha Mendengar
Al-Basir - Yang Maha Melihat
Al-Hakam - Yang Maha Menghukum
Al-'Adl - Yang Maha Adil
Al-Latif - Yang Maha Halus
Al-Khabir - Yang Maha Mengetahui
Al-Halim - Yang Maha Penyantun dan Penyabar
Al-'Azim - Yang Maha Agung
Al-Ghafur - Yang Maha Sedia Mengampuni
Ash-Syakur - Yang Maha Bersyukur
Al-'Ali - Yang Maha Tinggi
Al-Kabir - Yang Maha Besar
Al-Hafiz - Yang Maha Memelihara
Al-Muqit - Yang Maha Memberi Kekuatan
Al-Hasib - Yang Maha Menghitung
Al-Jalil - Yang Maha Mulia
Al-Karim - Yang Maha Memberi
Al-Raqib - Yang Maha Mengawasi
Al-Mujib - Yang Maha Memakbulkan
Al-Wasi' - Yang Maha Luas Ilmu dan Rahmat-Nya
Al-Hakim - Yang Maha Bijaksana
Al-Wadud - Yang Maha Pengasih
Al-Majid - Yang Maha Mulia
Al-Ba'ith - Yang Membangkitkan Manusia
Al-Syahid - Yang Maha Menyaksikan Segala Kebenaran
Al-Haqq - Yang Maha Benar
Al-Wakil - Yang Maha Pengurus
Al-Qawi - Yang Maha Berkuasa
Al-Matin - Yang Maha Teguh Kekuatan-Nya
Al-Wali - Yang Maha Memberikan Pertolongan
Al-Hamid - Yang Maha Layak Menerima Pujian
Al-Muhsi - Yang Maha Menghitung
Al-Mubdi - Yang Maha Memulakan Sesuatu
Al-Mu'id - Yang Maha Mengembalikan Ciptaan-Nya
Al-Muḥyi - Yang Maha Menghidupkan
Al-Mumit - Yang Maha Mematikan
Al-Hayy - Yang Maha Hidup
Al-Qayyum - Yang Maha Berdiri Sendiri
Al-Wajid - Yang Maha Memperoleh Segala Sesuatu Yang Dikehendaki-Nya
Al-Majid - Yang Maha Mulia
Al-Wahid - Yang Maha Esa
Al-Ahad - Yang Maha Tunggal
Al-Samad - Yang Kekal dan Menjadi Tempat Bergantung Sekalian Makhluk
Al-Qadir - Yang Maha Berkuasa
Al-Muqtadir - Yang Maha Menentukan Sesuatu
Al-Muqaddim - Yang Memulakan Wujudnya Sesuatu
Al-Mu'akhkhir - Yang Mentakhirkan Wujudnya Sesuatu
Al-Awwal - Yang Awal dan Tiada Permulaan
Al-Akhir - Yang Akhir dan Tiada Kesudahan
Al-Zahir - Yang Nyata
Al-Batin - Yang Tersembunyi
Al-Wali - Yang Maha Memiliki dan Memerintah Segala Sesuatu
Al-Muta'ali - Yang Maha Tinggi dan Suci
Al-Barr - Yang Menjadi Sumber Kebaikan
Al-Tawwab - Yang Sentiasa Menerima Taubat
Al-Muntaqim - Yang Membalas Dengan Seksa
Al-'Afu - Yang Maha Pemaaf
Al-Ra'uf - Yang Maha Pemberi Kasih Sayang
Malik-ul-Mulk - Pemilik Mutlak Segala Kekuasaan
Zu Al-Jalal wa Al-Ikram - Yang Memiliki Keagungan dan Kemuliaan
Al-Muqsit - Yang Maha Adil dan Saksama
Al-Jami' - Yang Maha Penghimpun
Al-Ghani - Yang Maha Kaya dan Tidak Memerlukan Sesuatu Apa-apa pun
Al-Mughni - Yang Maha Mengayakan Makhluk Sehingga Tidak Memerlukan Apa-apa
Al-Mani' - Yang Maha Menegah dan Menolak
Al-Darr - Yang Mendatangkan Kemudaratan
Al-Nafi' - Yang Memberikan Kebaikan dan Kemanfaatan
Al-Nur - Yang Maha Bercahaya
Al-Hadi - Yang Memberi Hidayah Kepada Hamba-Nya
Al-Badi' - Yang Maha Menciptakan Sesuatu yang sebelumnya tiada
Al-Baqi - Yang Berkekalan
Al-Waris - Yang Mewarisi
Al-Rasyid - Yang Memberi Petunjuk Kepada Kebenaran -
code reviewposted in Prompt
Review the entire codebase. Check for:
- API route correctness and error handling
- D1 query safety (SQL injection, missing params)
- TypeScript type consistency
- Missing edge cases
- Code that doesn't match the CLAUDE.md spec
-
Infographic 1:1posted in Prompt
Create a clean, modern 1:1 square infographic for a family WhatsApp group. Title: "[TITLE HERE]" Design a visually appealing infographic with the following information: [CONTENT HERE - list items, dates, details] Style: Soft pastel theme with warm earth tones (brown, cream, peach, sage). Each item should be in row format, easy to read at a glance. Include a small [RELEVANT ICON] icon next to each item. Use [LANGUAGE] for headers. Add a subtle footer text: "[FOOTER MESSAGE]". Make the text large and readable on mobile phones. Soft water splash background. -
RE: Claud Code spinner textposted in Prompt
Ramadhan version
"spinnerVerbs": { "mode": "replace", "verbs": [ "Bismillahirrahmanirrahim", "Subhanallah", "Alhamdulillah", "Astaghfirullah", "La ilaha illallah", "Allahu Akbar", "La hawla wa la quwwata illa billah", "Hasbunallahu wa ni'mal wakeel", "Rabbana atina fid dunya hasanah", "Allahumma salli ala Muhammad", "Rabbighfirli warhamni", "Inna lillahi wa inna ilaihi rajiun", "Tawakkaltu alallah", "MasyaAllah tabarakallah", "Rabbana la tuzigh qulubana", "Allahumma barik", "Ya Allah ya Rahman ya Rahim" ] } -
RE: Combine imageposted in Prompt

A seamless split-screen composite portrait featuring two people. On the left side, a close-up headshot of [Person A]. On the right side, a close-up headshot of [Person B]. The two images are blended naturally down the center with a soft transition, creating a single unified composition. Both subjects are looking slightly off-camera with a professional, journalistic photography style.Create a composite editorial photo combining two headshots side by side. The left person should be slightly in the foreground, facing right. The right person should be slightly behind, facing left. Blend the two photos seamlessly where they meet in the center, with a soft gradient transition. Use a warm, neutral indoor background with shallow depth of field. Professional news photography style, dramatic lighting, editorial magazine composition. -
Claud Code spinner textposted in Prompt
.claude/settings.jsonadd this
"spinnerVerbs": {
    "mode": "replace",
    "verbs": [
      "Jap eh",
      "Tengah fikir",
      "Sabar boss",
      "Tengah goyang kaki",
      "Lepak kejap",
      "Otw ni",
      "Tunggu ah",
      "Tengah menggoreng",
      "Rilek dulu",
      "Ala kejap je",
      "Memikirkan nasib",
      "Chill bro"
    ]
  }
some collected verbs
Jap eh
Tengah fikir
Sabar boss
Tengah goyang kaki
Lepak kejap
Otw ni
Tunggu ah
Tengah menggoreng
Rilek dulu
Ala kejap je
Memikirkan nasib
Chill bro
Sabar bossku
Kira duit japJap, tarik nafas
Amboi susahnya
Aduh pening
Weh kejap
Alamak banyaknya
Makan angin dulu
Pusing kepala ni
Hmm.. cemana ni
Ish... mencabar betul
Eh tunggu ah
Fuh letihnya
Hadap je laYa Allah bantulah aku
Sabar ye
Redha je
Meratib kejap
Bismillahirrahmanirrahim
Masyaallah banyaknyaWaduh kepala pusing
Wkwkwk kejap ye
Santai aja kak
Hmm... gimana ya
Ngopi dulu bang
Ribut ribut
Relaks aje bro -
Combine imageposted in Prompt
ChatGPT 5.2
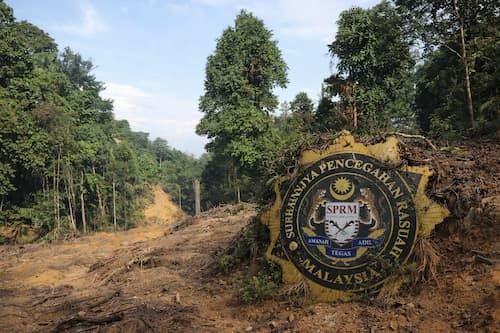
Gemini Nano BananaCombine the two subjects into a single cohesive, photorealistic scene using conceptual blending, not a split or collage. Primary rule: Both subjects must visually and symbolically merge into one unified environment. Composition and positioning: The rainforest landscape dominates the frame, occupying the left and center with strong visual weight, depth, and scale. The SPRM emblem is intentionally smaller and positioned on the right side of the scene, aligned to the right third of the frame. It sits partially embedded in the soil on the right foreground, never centered. Blending behavior: - No hard borders, no split screen, no visible seams - No blur-only transitions - The emblem integrates into the environment: roots, soil, and vegetation overlap and interlock with its form - Forest textures, colors, and lighting influence the emblem’s surface - Natural shadows and perspective connect both elements Style: Photorealistic, realistic composite Consistent daylight direction and color grading High detail, sharp focus Asymmetrical composition No artificial vignette or framing Intent: Create a visual metaphor where the forest remains the dominant environment, while the smaller emblem on the right feels naturally discovered within the landscape, not placed or pasted.Generic prompt
Combine two separate images into a single cohesive scene using conceptual blending rather than a split or collage.

Primary rule:
The two subjects must visually and symbolically merge into one environment.

Blending behavior:
- No hard borders, no split screen, no visible seam
- No blur-only transitions
- Elements from both images overlap, interlock, or embed into each other
- Textures, colors, and lighting transition naturally
- Both subjects influence each other’s form, placement, and environment

Composition:
- One unified scene, not two panels
- Balanced visual weight between both subjects
- Natural depth, shadows, and perspective

Style:
Photorealistic or realistic composite
Consistent lighting direction and color grading
High detail, sharp focus
No artificial vignette or framing

Intent:
Create a visual metaphor where both images feel meaningfully connected, not pasted together.
Resize: https://squoosh.app/
-
PM2 - ecosystem file - (interpreter & fork)posted in Linux
ecosystem.config.js
module.exports = { apps: [ // Next.js Web Dashboard { name: 'domain-web-5800', cwd: './web', script: 'npm', args: 'start -- -p 5800', env: { NODE_ENV: 'production', }, instances: 1, autorestart: true, watch: true, exec_mode: 'fork', max_memory_restart: '500M', error_file: '/var/www/domain/web-error.log', out_file: '/var/www/domain/web-out.log', merge_logs: true, time: true, }, // Telegram Bot Service (Express) { name: 'domain-bot-5801', cwd: './bot', script: 'src/index.js', env: { NODE_ENV: 'production', PORT: 5801, }, interpreter: '/root/.nvm/versions/node/v20.20.0/bin/node', instances: 1, autorestart: true, watch: true, exec_mode: 'fork', max_memory_restart: '300M', error_file: '/var/www/domain/bot-error.log', out_file: '/var/www/domain/bot-out.log', merge_logs: true, time: true, }, ], } -
RE: git using different ssh keyposted in Linux
File: ~/.ssh/config
Host github.com
    IdentityFile ~/.ssh/id_rsa_custom_key
    IdentitiesOnly yes
Create this file in the server, so it always execute this by default.
-
VSCode - code font size controlsposted in Ref
To fixed size in file, go to
Command + Shift + PGo to: "Preferences: Open User Settings (JSON)"Paste the code below;
"editor.fontSize": 16To control using
Command + +, Go to:Command + Shift + P>Preferences: Open Keyboard Shortcuts (JSON)Paste the code below;
{ "key": "cmd+=", "command": "editor.action.fontZoomIn" }, { "key": "cmd+-", "command": "editor.action.fontZoomOut" }, { "key": "cmd+0", "command": "editor.action.fontZoomReset" }, { "key": "cmd+=", "command": "-workbench.action.zoomIn" }, { "key": "cmd+-", "command": "-workbench.action.zoomOut" } -
RE: 2025 - bypass windows 11 online registration accountposted in Inbox
An alternative to bypass Microsoft Account creation during Windows 11 installation
SHIFT + F10
start ms-cxh:localonly
"Discovered by user @witherornot1337 on X, typing "start ms-cxh:localonly" into the command prompt during the Windows 11 setup experience will allow you to create a local account directly without needing to skip connecting to the internet first."
Ref: https://www.reddit.com/r/sysadmin/comments/1jp5vln/an_alternative_to_bypass_microsoft_account/
-
Netflix - Genre Code - as on July 2025posted in Inbox
Action TV and Adventure (10673)
Action Thrillers (43048)
Action Thrillers (43048)
Action and Adventure (1365)
Action comedians (43040)
Adult entertainment (11881)
Adventures (7442)
Adventures of sci-fi (6926)
African Movies ( 3761 )
Alien science fiction (3327)
Animated Comedy (9302)
Animated Fantasy (11146)
Animated Features (3063)
Anime (7424)
Anime Action (653)
Anime horror (10695)
Anime series (6721)
Art House Movies (29764)
Asian action movies (77232)
Baseball movies (12339)
Basketball movies (12762)
Belgian films (262)
Biographic Drama (3179)
Biographical Documentaries (3652)
Black Comedy (869)
Boxing movies (12443)
British Movies (10757)
British Television Shows (52117)
Campy movies (1252)
Cartoon television (11177)
Characteristics of the Creature (6895)
Child Education (10659)
Children's Music (52843)
Children's Music (52843)
Children's television (27346)
Children's television (27346)
Chinese Movies (3960)
Classic Action & Adventure (46576)
Classic Comedy (31694)
Classic Drama (29809)
Classic Drama (29809)
Classic Movies (31574)
Classic Romantic Movies (31273)
Classic TV Shows (46553)
Classic Thrillers (46588)
Classic Thrillers (46588)
Classic Westerns (47465)
Classic foreign movies (32473)
Classic foreign movies (32473)
Classic sci-fi and fantasy (47147)
Classic sci-fi and fantasy (47147)
Classic war movies (48744)
Classical Musicians (32392)
Coins of the period (12123)
Comedy (6548)
Comedy Night (1402)
Comedy for Teenagers (3519)
Comedy of horror (89585)
Concert music and documentaries (90361)
Country and Western/Folklore (1105)
Court room drama (528582748)
Crazy Romance (36103)
Crime Drama (6889)
Crime action and adventure (9584)
Criminal TV Shows (26146)
Criminal Thrillers (10499)
Cry of Teenagers (52147)
Cult Horror Movies (10944)
Cult Horror Movies (10944)
Cult Movies (7627)
Cult TV Programs (74652)
Cult comedies (9434)
Deep Sea Horror Movies (45028)
Dirty Movies (53310)
Disney (67673)
Disney Musicians (59433)
Documentaries (6839)
Documentaries on crime (9875)
Drama (5763)
Drama based on books (4961)
Drama based on real life (3653)
Drama for Teenagers (9299)
Drama of social problems (3947)
Dutch films (10606)
Eastern European movies (5254)
Epic (52858)
Experimental films (11079)
Faith and Spirituality (26835)
Faith and Spirituality of Children (751423)
Family features (51056)
Fantasy Movies (9744)
Football Movies (12549 )
Foreign Documentaries (5161)
Foreign Documentaries (5161)
Foreign Drama (2150)
Foreign Drama (2150)
Foreign Scientist and Fantasy (6485)
Foreign Scientist and Fantasy (6485)
Foreign Thrillers (10306)
Foreign Thrillers (10306)
Foreign action and adventure (11828)
Foreign action and adventure (11828)
Foreign comedies (4426)
Foreign comedies (4426)
Foreign horror movies (8654)
Foreign horror movies (8654)
Foreign movies (7462)
French films (58807)
Gangster Movies (31851)
German Movies (58886)
Greek Movies (61115)
Historical Documentaries (5349)
Horror Movies (8711)
Horror Movies B (8195)
Horror Movies B (8195)
Horror TV (83059)
Hot Romantic Movies (35800)
Independent Drama (384)
Independent Drama (384)
Independent Movies (7077)
Independent Romantic Movies (9916)
Independent Romantic Movies (9916)
Independent Thrillers (3269)
Independent Thrillers (3269)
Indian films (10463)
Indie Action & Adventure (11804)
Indie Comedy (4195)
Irish films (58750)
Italian Movies (8221)
Japanese films (10398)
Jazz and Easy Listening (10271)
Korean Movies (5685)
Korean TV Programs (67879)
Latin American Movies (1613)
Latin Music (10741)
Lobisome Horror Movies (75930)
Martial arts boxing and wrestling (6695)
Martial arts films (8985)
Military Documentaries (4006)
Military action and adventure (2125)
Military dramas (11)
Military television programs (25804)
Mini Series (4814)
Monster Movies (947)
Movies based on children's books (10056)
Movies for ages 11-12 (6962)
Movies for ages 2-4 (6218)
Movies for ages 5-7 (5455)
Movies for ages 8-10 (561)
Movies for kids 0-2 years old (6796)
Movies for kids and family (783)
Movies from the Middle East (5875)
Movies in Australia (5230)
Movies of Faith and Spirituality (52804)
Music (1701)
Musical comedy (13335)
Musicians of Showbiz (13573)
Mysteries (9994)
Mysteries of TV (4366)
New Zealand Movies (63782)
Political Documentaries (7018)
Political Drama (6616)
Political Thrillers (10504)
Political comedies (2700)
Psychological Thrillers (5505)
Reality TV (9833)
Religious documentaries (10005)
Rock & Pop Show (3278)
Romantic Drama (1255)
Romantic Drama (1255)
Romantic Movies (8883)
Romantic comedy (5475)
Romantic comedy (5475)
Romantic foreign movies (7153)
Romantic foreign movies (7153)
Romantic heartbeats (502675)
Russian (11567)
Satanic Tales (6998)
Satire (4922)
Scandinavian films (9292)
Sci Fi Anime (2729)
Sci Fi Horror Movies (1694)
Sci Fi Thrillers (11014)
Sci Fi Thrillers (11014)
Sci Fi and Fantasy TV (1372)
Sci Fi and Fiction (1492)
Science and Nature TV (52780)
Science fiction action and fantasy (1568)
Science fiction and fantasy cult (4734)
Science fiction and fantasy cult (4734)
Science fiction drama (3916)
Scientific and natural documentaries (2595)
Screwball Comedies (9702)
Showbiz Drama (5012)
Slap Comedy (10256)
Slasher Movies and Serial Killer (8646)
Soccer Movies (12803)
Social and Cultural Documentaries (3675)
Southeast Asian Movies (9196)
Spanish Movies (58741)
Spiritual Documentaries (2760)
Sport Comedy (5286)
Sport Comedy (5286)
Sports Drama (7243)
Sports Drama (7243)
Sports and fitness (9327)
Sports documentaries (180)
Sports documentaries (180)
Sports movies (4370)
Spy Action & Adventure (10702)
Spy Thrillers (9147)
Stage Musicians (55774)
Stand Up Comedy (11559)
Steam Thrillers (972)
Superhero comics and movies (10118)
Supernatural Horror Movies (42023)
Supernatural Thrillers (11140)
TV Drama (11714)
TV Programs for Teenagers (60951)
TV shows (83)
Tales of Animals (5507)
Television comedy (10375)
Television documentaries (10105)
The Tears (6384)
Thrillers (8933)
Travel and adventure documentaries (1159)
Travel food & TV (72436)
Urban Concerts and Dancing (9472)
Vampire horror movies (75804)
Western ( 7700 )
World Music Concert (2856)
Zombie Horror Movies (75405)
Zombies (26)
anime dramas (452)
black Movie (7687)